Set up a new Mac with Dev Container
Follow this guide to set up a new Mac development machine with a VS Code Dev Container.
Prerequisites
This guide assumes you have a machine running Apple Silicon (M1 or M2).
You'll need two prerequisites:
Carta has a corporate license for Docker Desktop, which you can request through Productiv (sign in using Okta).
Getting access
Our source code is stored in a self-hosted GitLab instance.
Request access via Productiv.
Allocating Docker virtual machine resources
Docker runs containers within a virtual machine, which has its own resource limits.
In Docker Desktop, go to Settings ➡ Resources and configure:
- CPUs: 10
- Memory: 50% of your Mac's physical memory
- Virtual disk limit: About 200GB
then click Apply & restart.
Setting up your SSH key
The best way to authenticate against GitLab is using an SSH key pair.
These steps should all be performed after logging in to the virtual machine using ssh.
Generating a key pair on the Mac
If you don't already have an SSH key pair (or aren't sure), start by generating one.
ssh-keygen -t ed25519
Press Return to accept all the defaults (unless you want to use a passphrase).
Add the key to your SSH agent. This allows it to be shared with the dev container.
ssh-add --apple-use-keychain ~/.ssh/id_ed25519
Associating the key with your GitLab account
Print out the public key:
cat ~/.ssh/id_ed25519.pub
Select the whole line and copy it.
Go to GitLab ➡ Preferences ➡ SSH Keys. Paste the newly created public key into the Key textbox. Give it some sort of meaningful Title, then click Add key to bind it to your account.
Note: the key will automatically expire on the date shown in the
Expiration datefield. If you don't want the key to expire, click theXto clear that field — you can still manually revoke any key from that page.
Tell Git your identity
Tell Git your name and email address. These will be attached to anything you commit.
git config --global user.name "Barry Gordy"
git config --global user.email "barry.gordy@cartacapitalmarkets.com"
Optional but recommended: Enable the
pull.rebaseandpush.autoSetupRemoteoptions.git config --global pull.rebase on git config --global push.autoSetupRemote on
Generate a GitLab personal access token
Head to GitLab ➡ Preferences ➡ Access Tokens. Type any name into the Token name input field. Under Select scopes, select the read-api scope level, then click Create personal access token. The token will appear in a readonly field at the top of the page:

Click the clipboard icon at the far right to copy it.
We'll store this in an environment variable within your shell profile.
echo export GITLAB_TOKEN='<paste token here>' >> ~/.zshrc
Replace
<paste token here>with the token you copied from GitLab. Make sure the single quotes are still present.
The GITLAB_TOKEN variable will be present next time you log in. To load it into the current session, source the profile file:
source ~/.zshrc
Cloning the repository
We'll clone the repository from a terminal on the Mac, then switch into the dev container to do our work.
First, create the directory structure into which to clone the code. We still have multiple repositories active, so it's helpful to create a structure that mirrors the GitLab repository names.
mkdir -p work/platform && cd work/platform
Clone the code.
git clone git@gitlab.cartax.io:platform/meta && cd meta
Opening the repo in the dev container
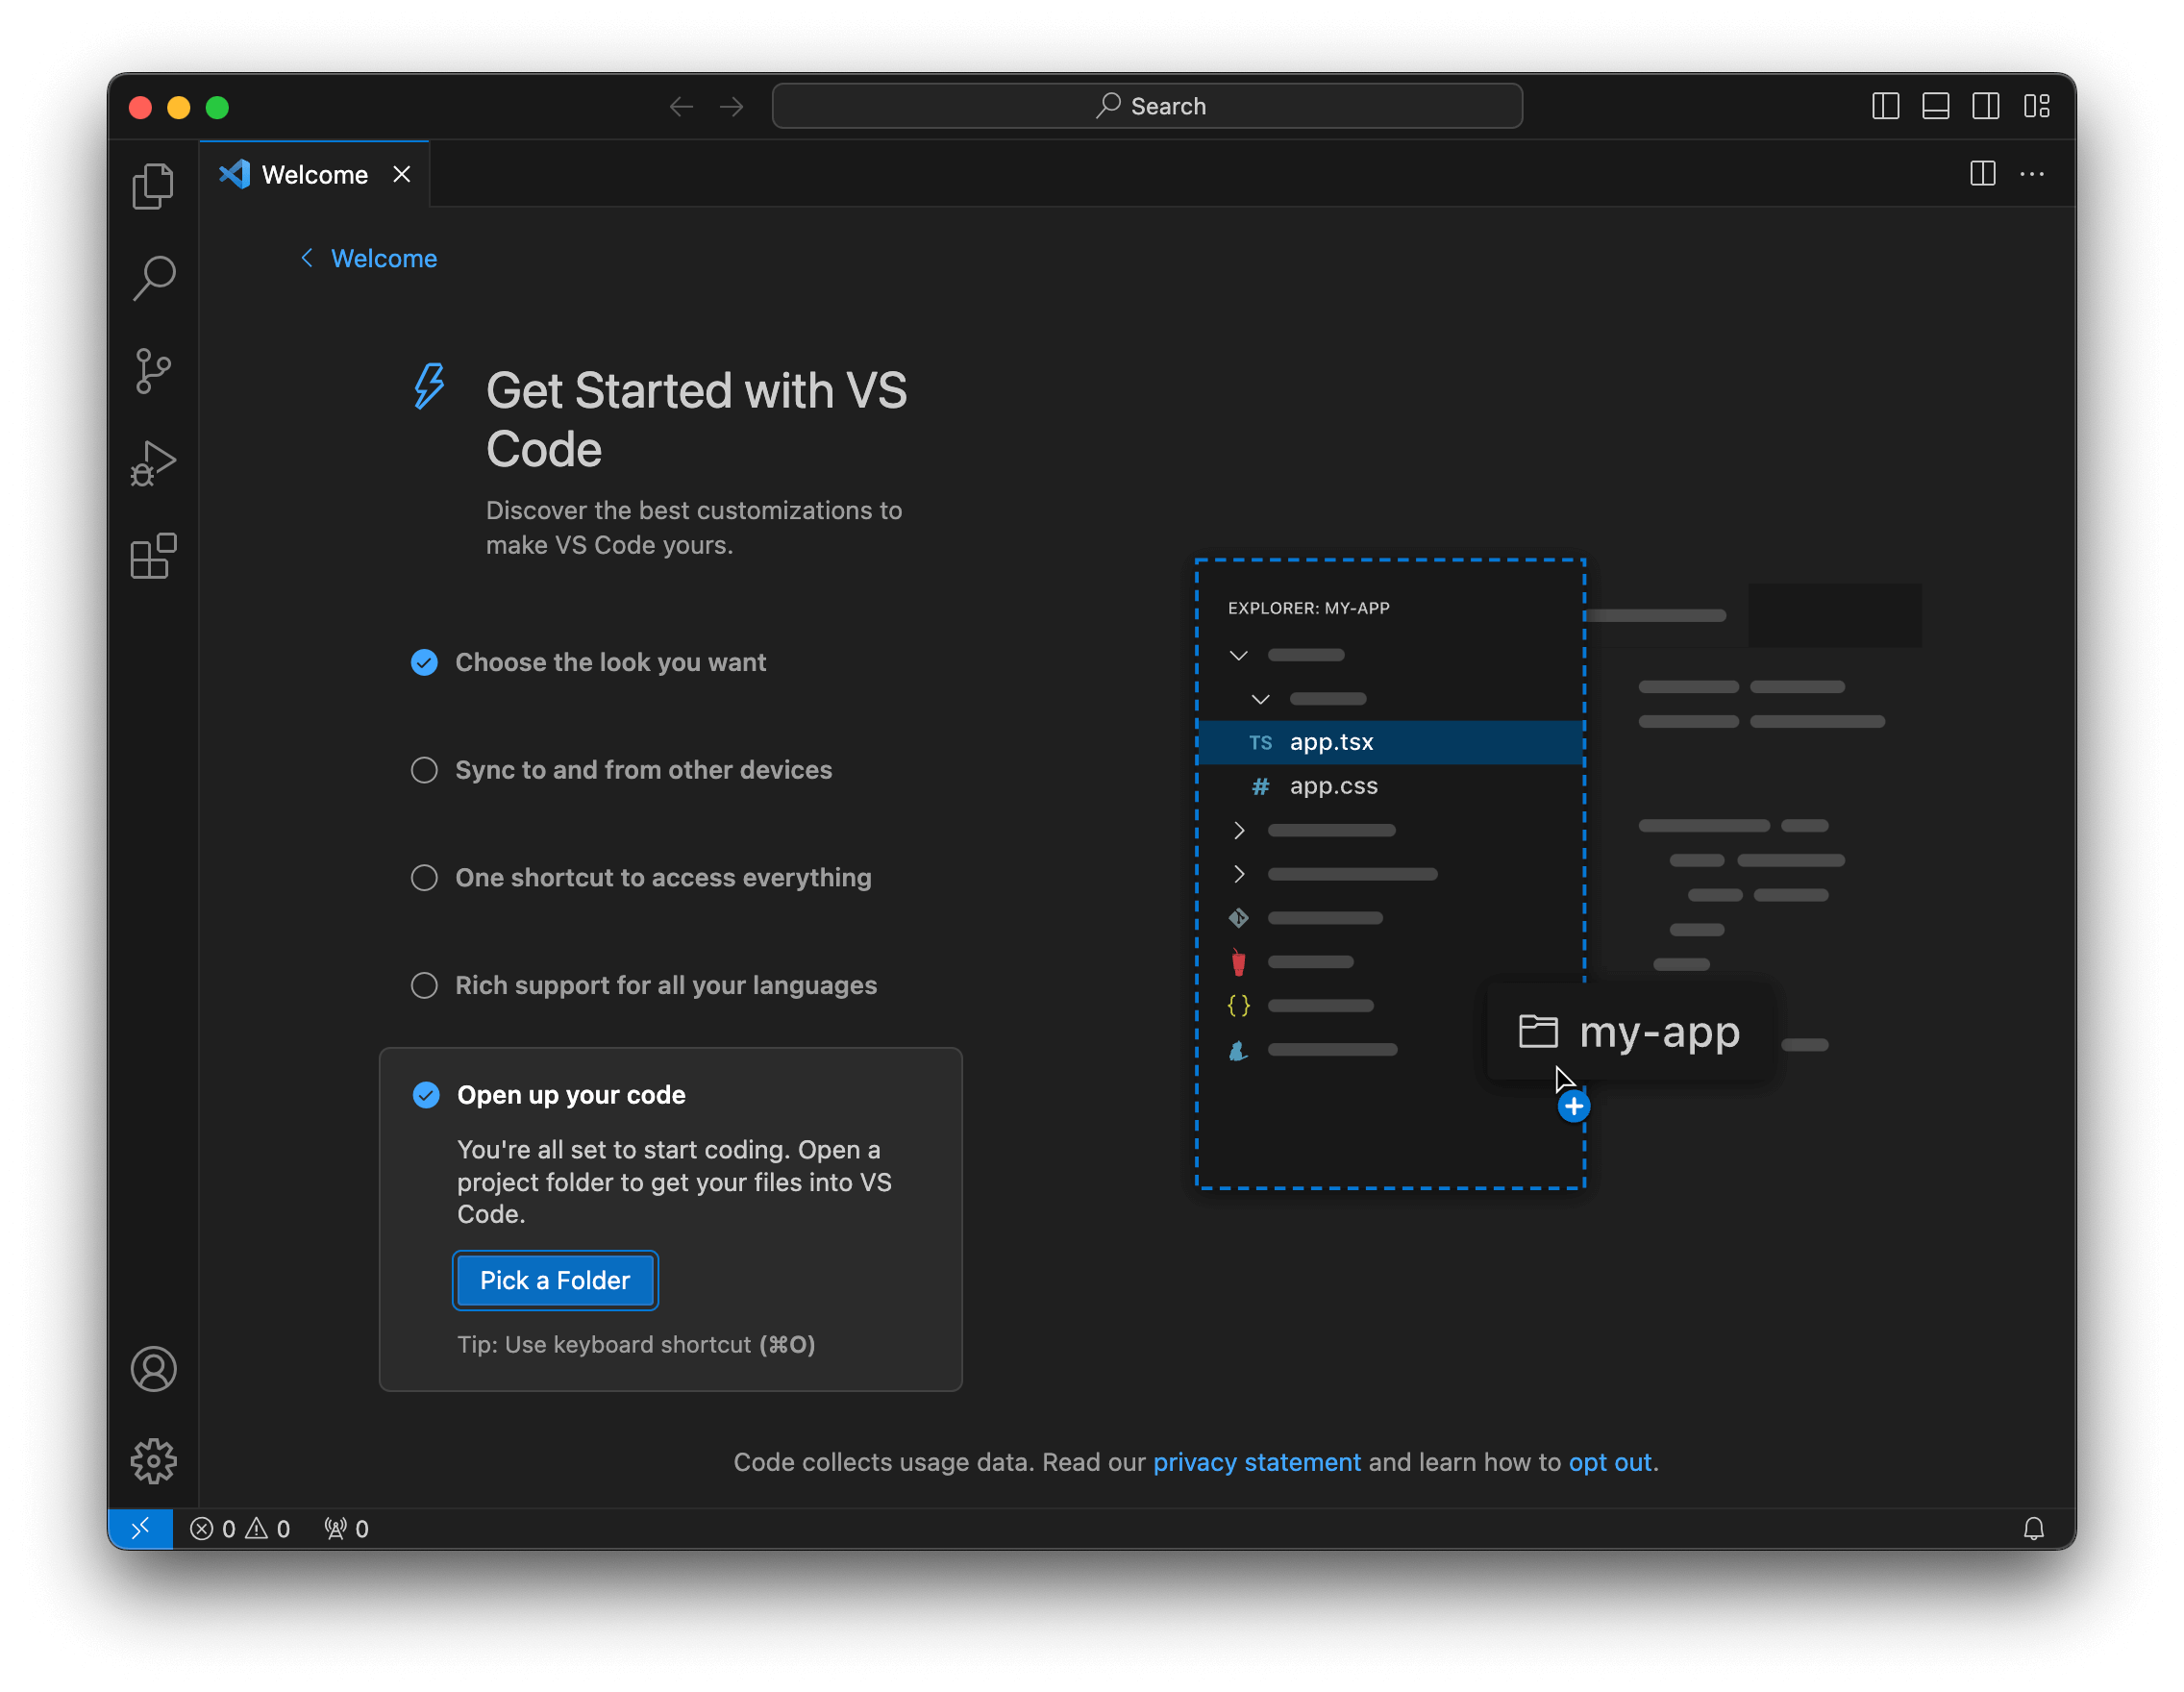
Open Visual Studio Code. From the Welcome screen, select Open up your code and click Pick a Folder.
Navigate to the meta directory, then click Open.
If prompted, click Yes, I trust the authors.
When prompted to install the Dev Containers extension, click Install.
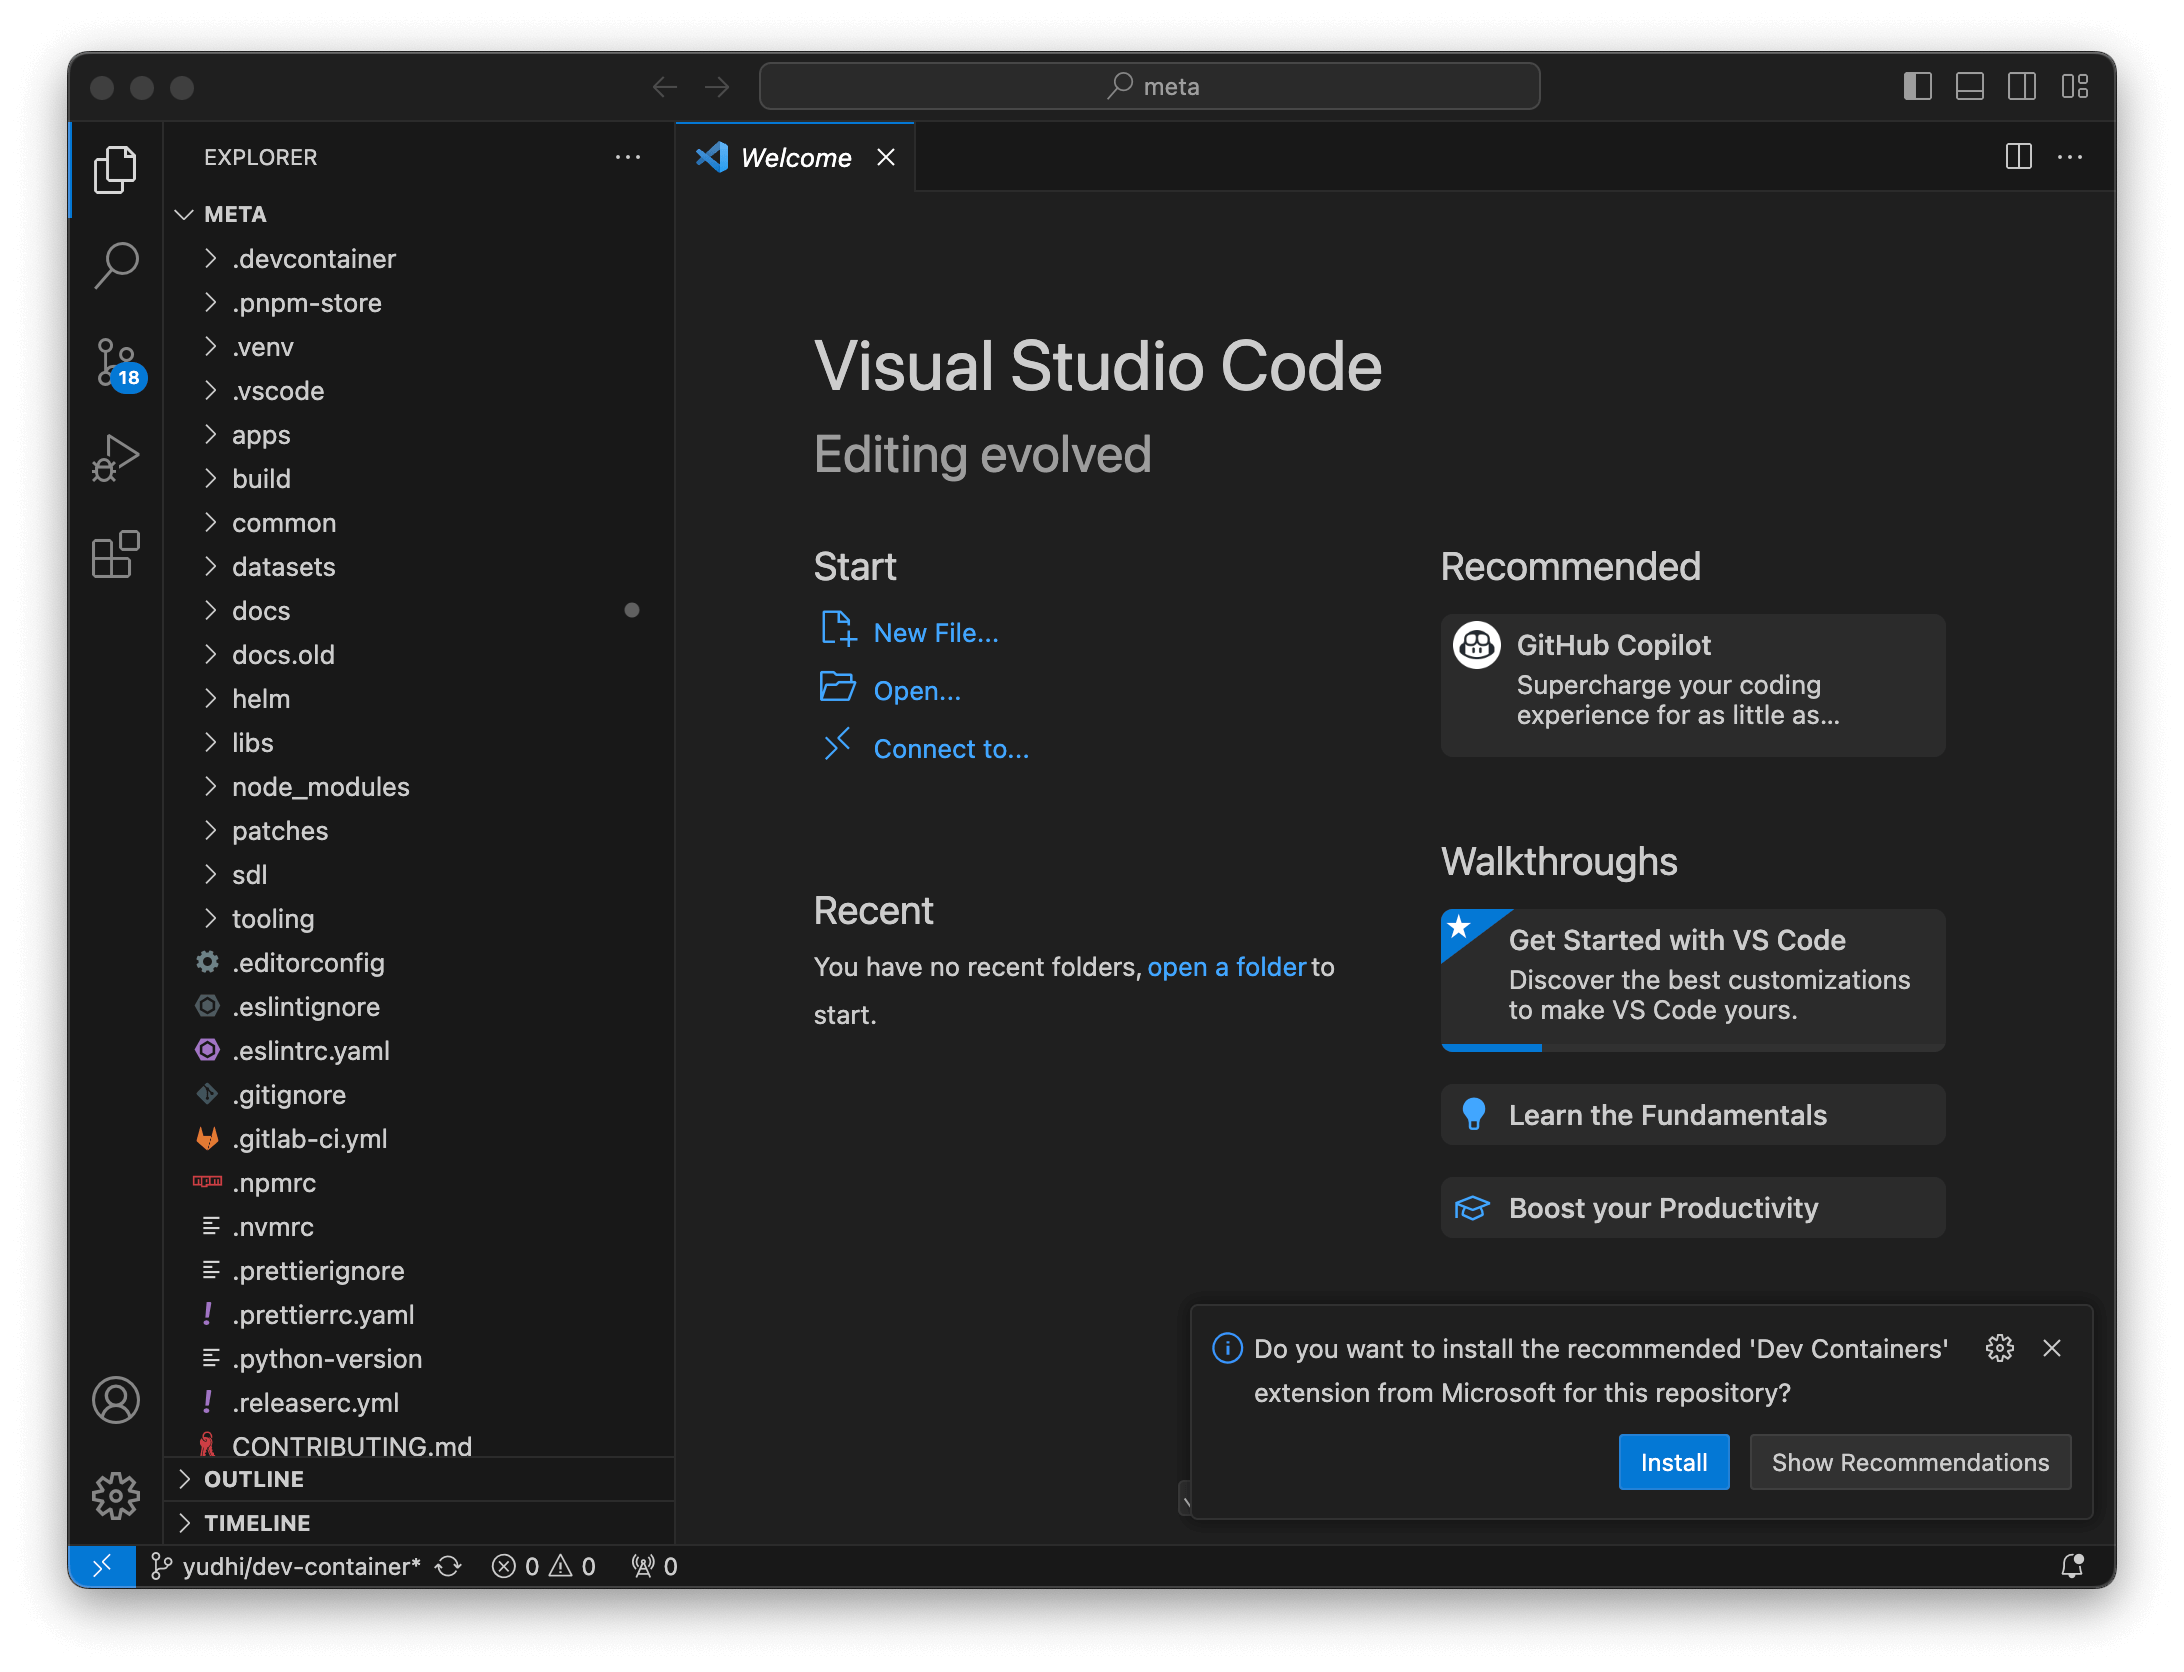
Once the extension is installed, you'll get a new prompt telling you that the folder contains a Dev Container configuration file. Click Reopen in Container.
It may take a few minutes to build the container the first time. If it fails, press Retry. Make sure your Docker Dev Container is running.
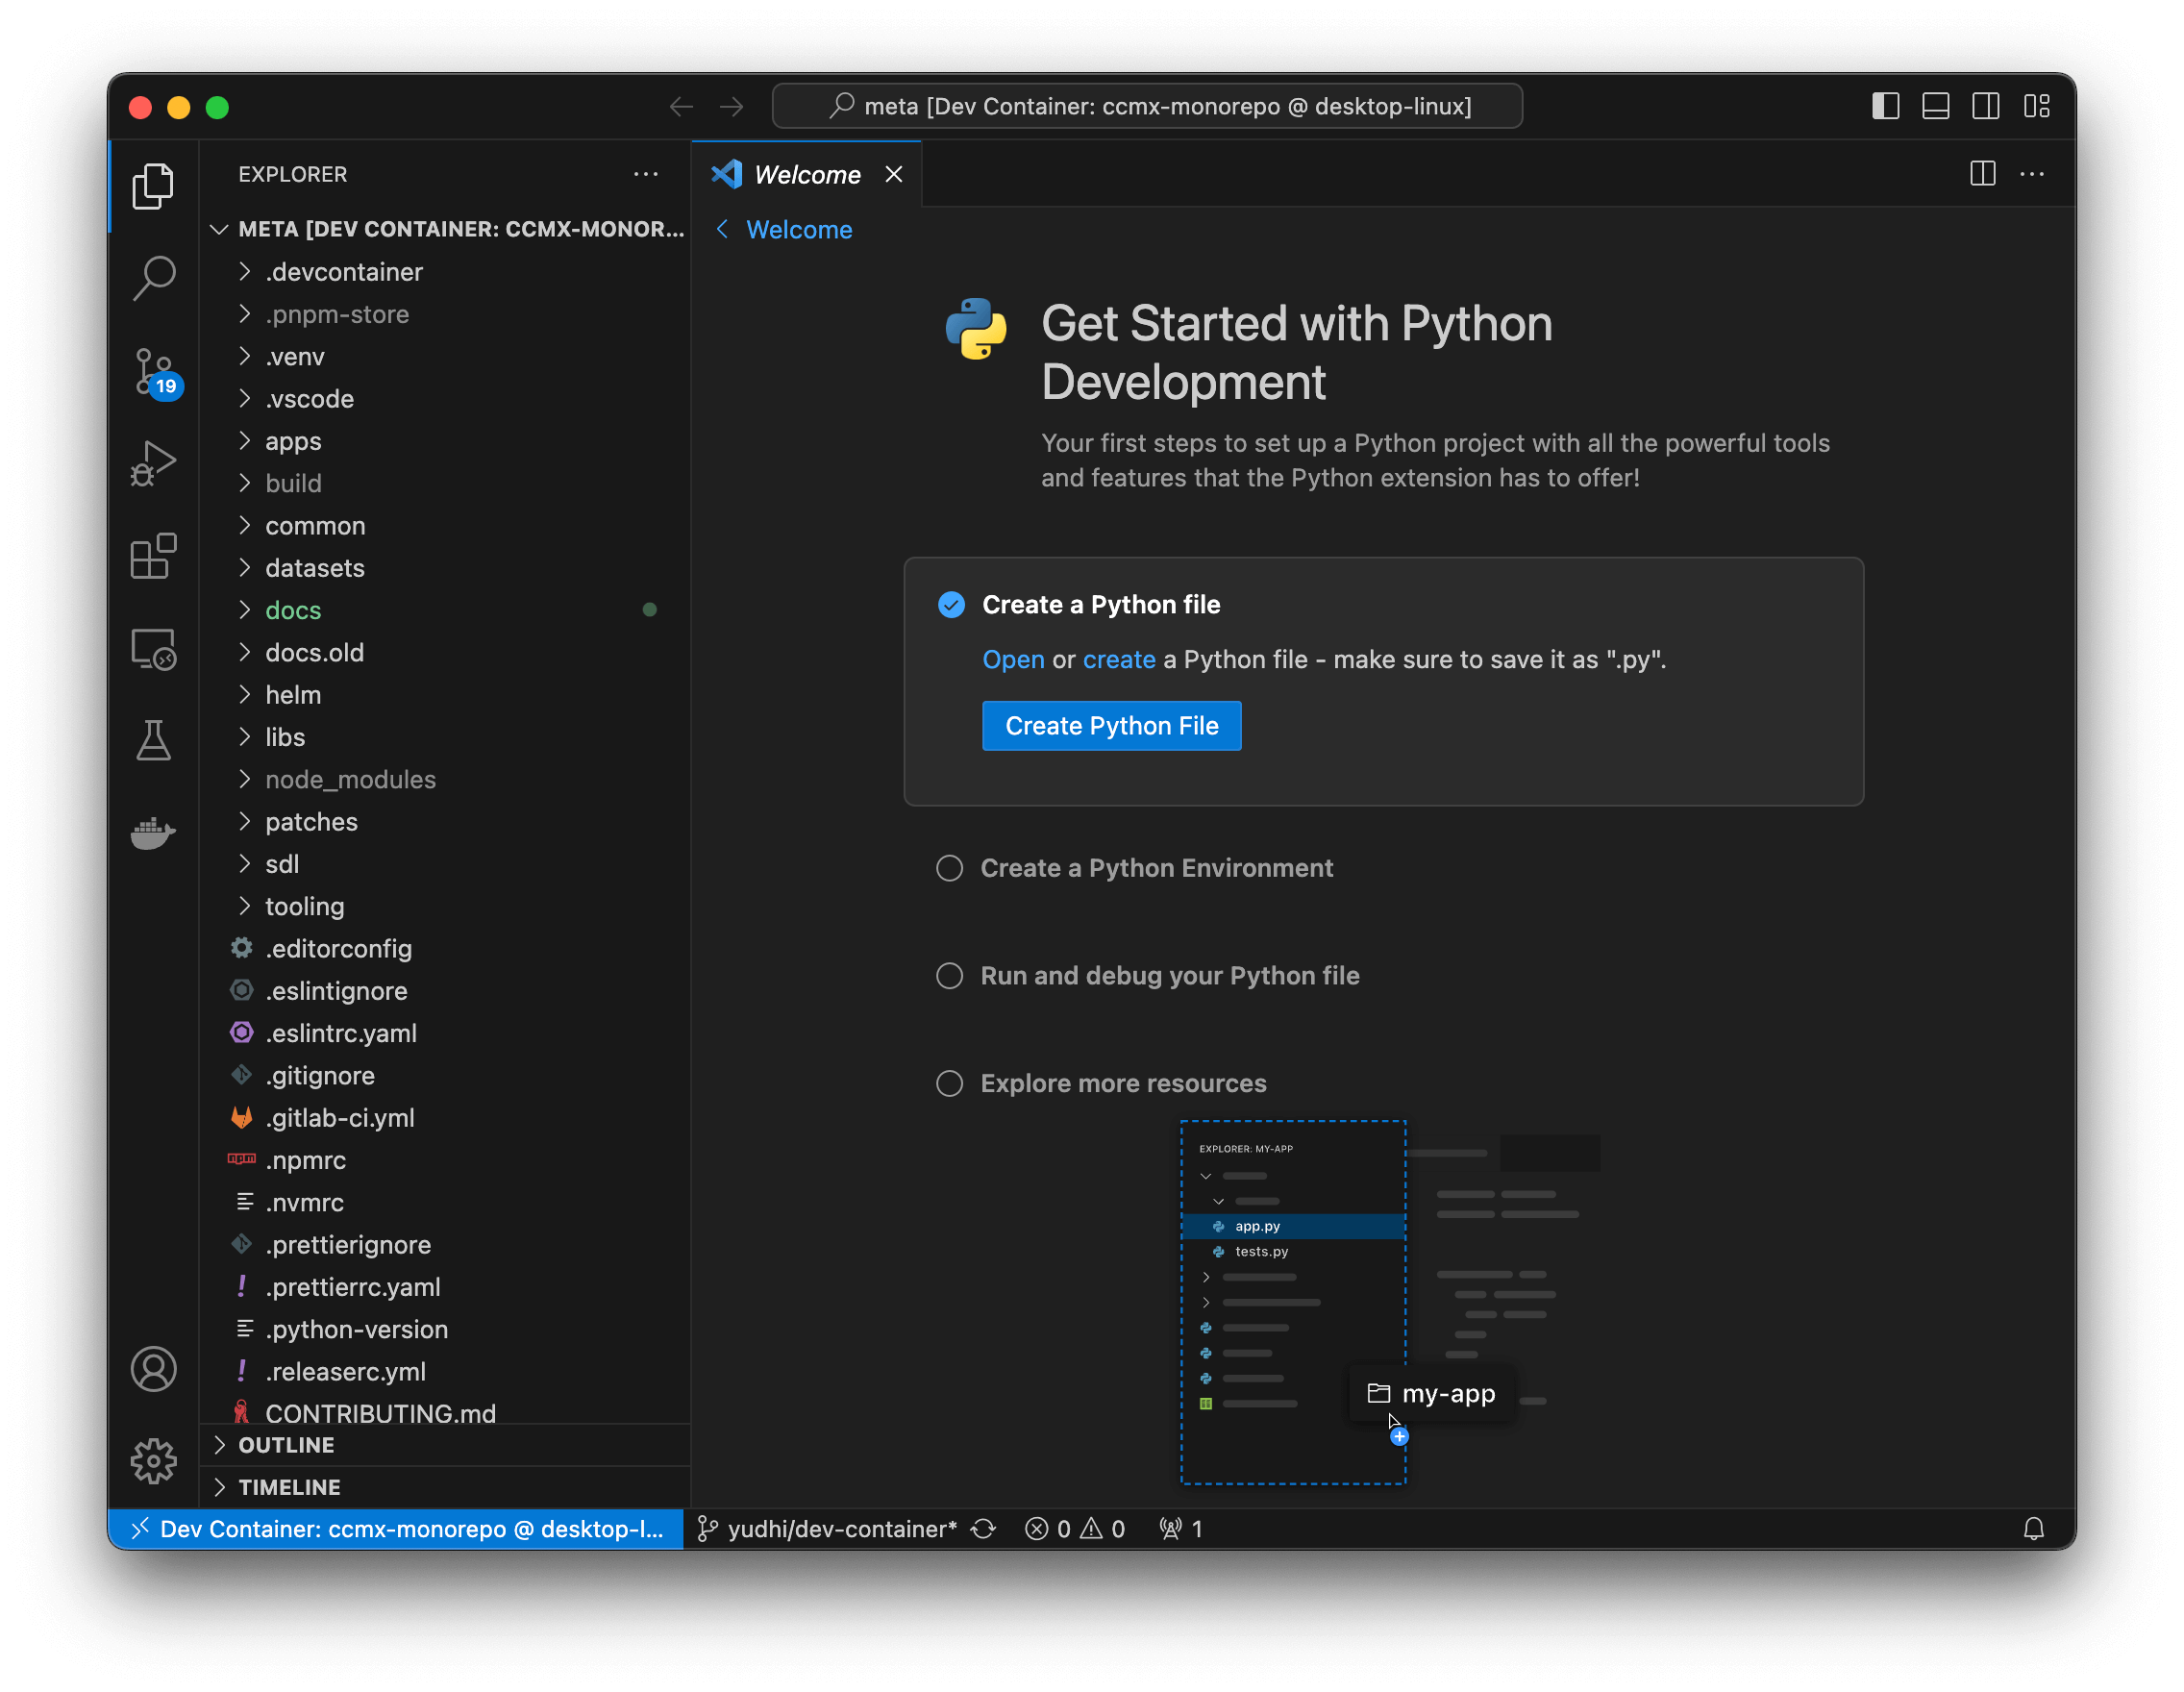
Once complete, you should see Dev Container: ccmx-monorepo in the bottom-left corner of the window.
Installing dependencies using pnpm
From the Terminal menu, select New Terminal.
In the terminal, run this command to download all application-level dependencies.
pnpm install
(See Troubleshooting below if this fails)
(Optional) Building and running MarketGrid
Unless you're working on the MARS service, you can skip this section.
To build MarketGrid (MARS), change into apps/marketgrid and run its build command:
make -j $(nproc)
To run MarketGrid, you will need to configure some amount of shared memory in Docker. From Settings | Docker Engine, paste in this configuration:
{
  "builder": {
    "gc": {
      "defaultKeepStorage": "20GB",
      "enabled": true
    }
  },
  "default-shm-size": "16g",
  "experimental": false
}
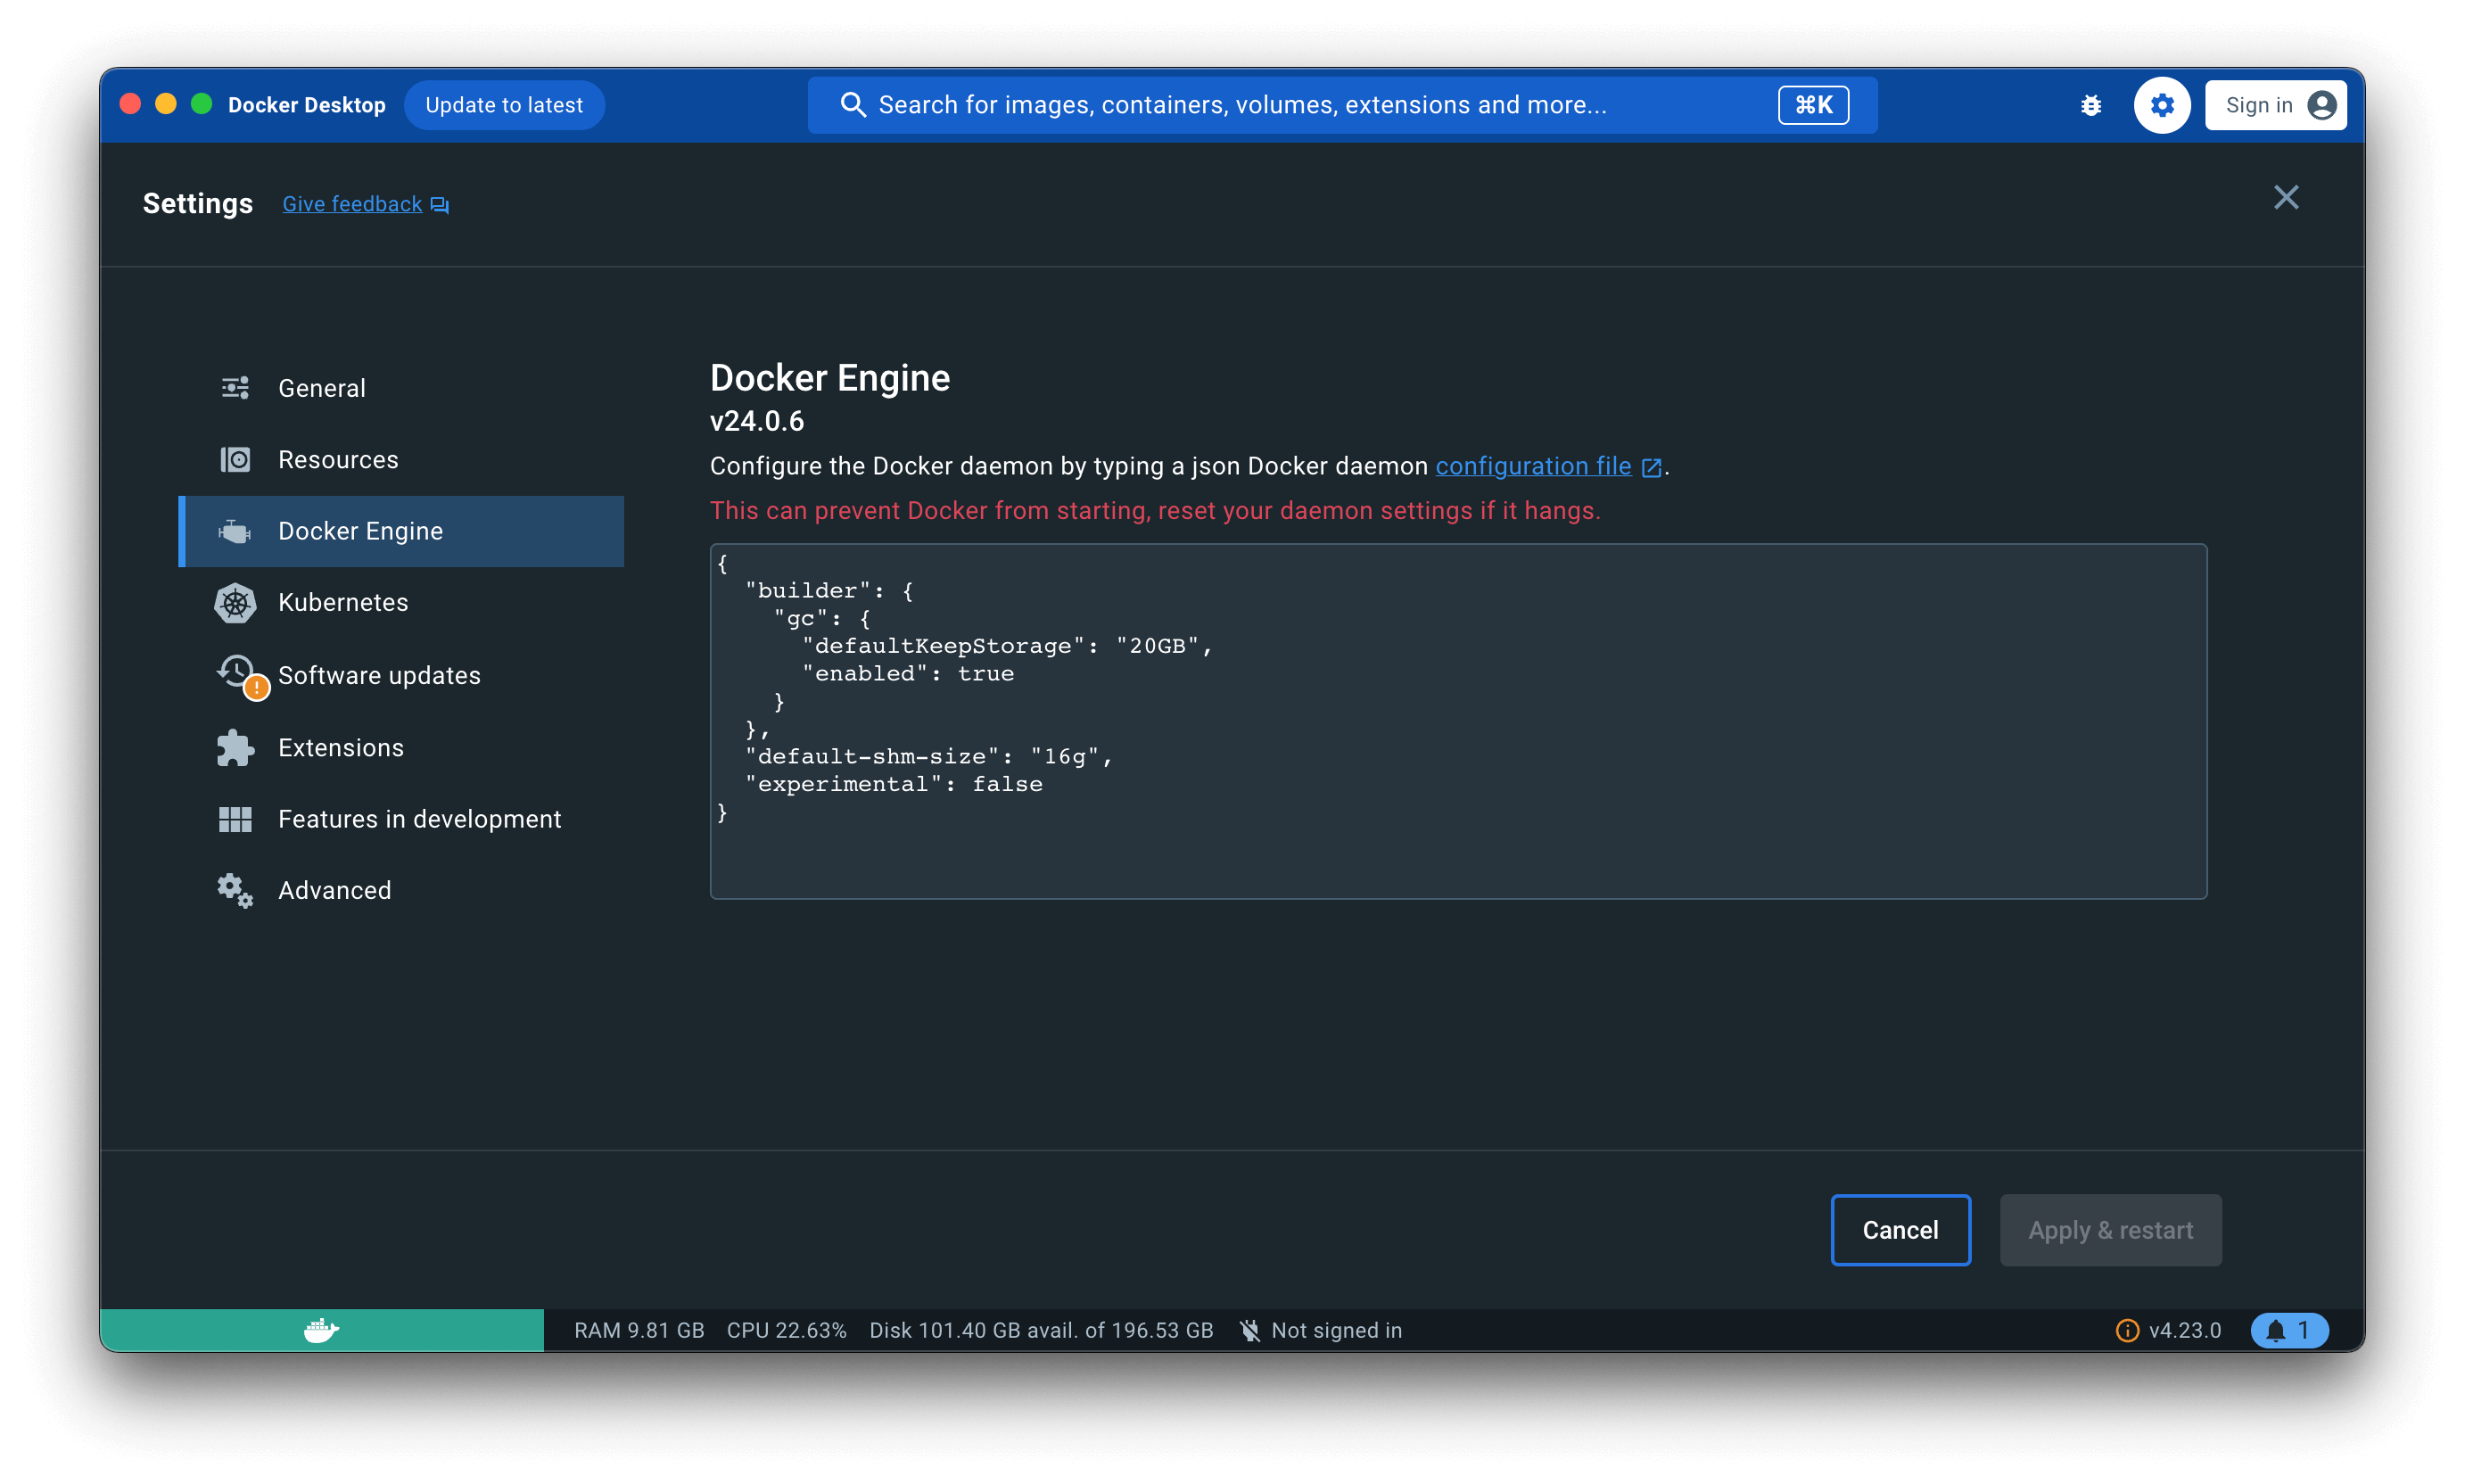
This will make a 16GiB shared memory mount available within any container (this does not actually consume 16GiB of memory, but just enables it to be used). You can adjust this to a different value if needed.
Add .env.local
Go to 1password and copy the contents for Meta frontend .env.local into .env.local
Next Steps
Now you can try running some of the applications locally.
Run in terminal to create topics:
rpk create topic snapshot
rpk create topic snapshot-index
rpk create topic queue
Run in separate terminals in dev container to start frontend:
pnpm start:frontend
pnpm start:websocket-server
pnpm start:rest-gateway
Open localhost:3000 in your browser and login as admin. Login information should be in 1password.
Congratulations on your setup! For all other meta repos and their start command, look at package.json.
Troubleshooting
pnpm install and node_modules
If pnpm install fails with a permission problem on node_modules
❯ pnpm install
Scope: all 23 workspace projects
Lockfile is up to date, resolution step is skipped
Packages: +1982
++++++++++++++++++++++++++++++++++++++++++++++++++++++++++++++++++++++++++++++++++++++++++++++++++++++++++++++++++++++++++++++++++++++++++++++++++++++++++++++++++++++++++++++++++++++++++++++++++++++++++++++++++++++++++++++++++++++++++++++++++
 EACCES  EACCES: permission denied, mkdir '/workspaces/meta/node_modules/.pnpm'
The problem is the effective user in the container does not have access to node_modules.
On your mac do;
- go to
meta/ - run
npx npkill - delete (press space) the
node_modulespath
Simply rm -rf node_modules might also suffice.